Download Vainglory on Google Play
Download Vainglory in the App Store
Download For Free

Vainglory Lore: Taka

  • Vainglory
  • |
  • Mar 24, 2017

Chapter One: TAKA


‘Blade In Shadow’

Read the comic in your language!

Français Italiano Deutsch Español 한국어 日本語 简体中文  繁體中文 Türkçe Русский Português (Brazil)

Tap to reveal story

Chapter Two: GWEN

‘Guns & Sun’

Read the comic in your language!

Français Italiano Deutsch Español 한국어 日本語 简体中文  繁體中文 Türkçe Русский Português (Brazil)

Tap to reveal story

ALTERNATE FATES

‘Shiro Kage’ Taka

The Grotesque Grin
The Unloved Dead

‘School Days’ Taka

Kendo Club Master

‘Night Shadow’ Taka

The Gythian Wall


Flicker Hero Breakdown — Get the Early Edge

  • Vainglory
  • |
  • Nov 11, 2016

flicker_hero_splashart_final
The shadows can be a trusted ally or a dangerous foe. For Flicker, the shadows are home. No hero utilizes stealth as effectively as Flicker. Able to ambush from out of nowhere and grant his entire team stealth, he can swing a teamfight in seconds. Using his heroic perk, Flicker is exceptional at scouting ahead and creating a favorable fight dynamic for his allies. Flicker players will want to not only build vision but also disrupt enemy vision so that when he appears next to enemy heroes, he can deploy his slow and damaging abilities for maximum effect. But most of all, Flicker gives damage-heavy teammates a way to reach the enemy back line and make mayhem before it’s clear what hit them.

Read on to learn how to utilize this sneaky roam hero …

HERO ABILITIES

Bracket2
flicker_heroic_perk_sqaure

Willow Whisper (Heroic Perk)

Flicker gains stealth and a move speed bonus when in brush for a short duration. Flicker can then leave the brush and remain stealthed for a time. Taking damage or using abilities removes stealth.


flicker_aBinding Light (A)

Flicker commands his fairies to swarm a target location, dealing damage to enemies standing within it. When the effect expires, fairy light roots any enemy heroes still within the area.


flicker_bFairy Dust (B)

Flicker swirls fairy dust around him, slowing and dealing damage to anyone inside the dusted area. After a short duration, the dust ignites, dealing a burst of damage.


flicker_c

Mooncloak (Ultimate)

Flicker and his allies temporarily gain stealth and a move speed bonus. The stealth will break when a hero uses an ability, attacks or takes damage.


head_bracket

DUELING

bottom_bracket

As a roam hero, Flicker prefers teamfights where his large AOE attacks and team-wide ultimate come in handy. Thanks to his heroic perk, his ability to ambush enemies is unparalleled. Rather than doing the damage himself, he enables his allies to ambush the enemy carry. Flicker can stealth a teammate who can then gank the lane. Got a backline mage causing you problems? No more! With Flicker, you can reach and poke mages through stealth. Additionally, while his damage isn’t too high, he can pick off weak enemies when necessary. His Fairy Dust ability (B) is a great slow and makes his more powerful Binding Light (A) more likely to hit. Stutter-stepping ensures you do the most damage possible before you once again flee into the brush.

head_bracket

TEAMFIGHTS

bottom_bracket

Flicker shines in teamfights, where his team stealth ability allows him to set the terms of combat. Flicker players typically have to be pretty close to thick of things to be effective.

If possible, a Flicker player should use his Mooncloak (C) to ensure that he and his teammates get right on top of the enemy carry. Then, once in position, Flicker initiates combat by utilizing his Fairy Dust to slow the enemy carry. Again, deploying Binding Light as soon as possible (and on the slowed enemy) is paramount.

You can also use the powerful Fairy Dust ability to peel for your carry. In this situation, a Flicker player needs to stick by their carry. While their carry kites away, the Flicker player uses their potent B + A combo to keep the enemy in place. In most 2v1 scenarios, it will be Flicker’s job to keep the enemy slowed with the Fairy Dust ability and then place the Binding Light in the enemy’s path to ensure it hits.

If you’re on the receiving end of a 2v1 scenario, Flicker has several escape options. While fleeing, Flicker should drop his Binding Light in a place that will deter the enemies from chasing you. If possible, try to wait in nearby brush until the stealth resets and then flee. If you’re really in a bind, Flicker’s ultimate can prove a fantastic way to disappear.

An important note about Flicker’s ultimate: When setting up an ambush, make sure that your allies are not doing any damage to enemy heroes. This includes bleeding effects from Taka or Fortress’ abilities, for example. If your allies are damaging enemies, they’ll immediately lose stealth.

head_bracket

WEAPON BUILDS

bottom_bracket

fountain-of-renewalFountain of Renewal: As a roam hero, building health and healing are paramount concerns for Flicker. He’s not particularly durable and benefits greatly from health. Fountain should be the first item rushed.


Items_stormcrownStormcrown: The extra energy and damage are great for Flicker, allowing him to spam his abilities and gives his basic attacks more of a punch.


crucibleCrucible: Another great item for a roam hero who needs to keep his allies alive.


atlas-pauldronAtlas: Flicker can use it while he’s stealthed and can sneak up on the enemy carry before they even know what happened.


aftershockAftershock: If you want more damage, then Aftershock is a great buy. Flicker’s Binding Light is spamable, so triggering Aftershock isn’t difficult. Flicker can also usually get a basic attack on people.


contraptionContraption: Flicker will want to clear enemy vision in order to make his stealth more potent.


head_bracket

STRONG VERSUS

bottom_bracket

celesteCeleste: Squishy carries like Celeste, Ringo and Skaarf are easy pickings for Flicker. Without an easy way to escape, Celeste can be quickly trapped by Fairy Dust.


krulKrul: Some melee heroes, including Krul, lack good counters to slowing effects like Fairy Dust.
head_bracket

WEAK VERSUS

bottom_bracket

glaiveGlaive: Glaive can knock Flicker back and get him out of position, making it hard for Flicker to close and use Fairy Dust effectively.


lanceLance: Lance can knock back Flicker to prevent Flicker from closing. Lance also has an escape ability that makes it hard to contain him.


baronBaron: Baron’s range can keep Flicker away and when Flicker does manage to close, he can simply jump away from Flicker’s Fairy Dust.


head_bracket

PRO TIPS

bottom_bracket

  • Make sure you’re casting your Binding Light after Fairy Dust hits. It’s much harder to hit otherwise.
  • Your stealth is global, so you can save a teammate who is being chased.
  • If careful, you can run from brush to brush without being seen in the jungle because of the cooldown on the stealth. But in larger gaps, he’ll unstealth briefly.
  • Aggressively use stealth and harass tactics. His energy costs are moderate, so Flicker can use his abilities often. Why not gank your enemies and then run to the brush, then gank again before heading to the jungle? The point is to never let your opponent know what you’re doing. Always be the smartest Bleekos in the room.

Flicker Abilities & Splash Art Revealed!

  • Vainglory
  • |
  • Oct 31, 2016

flicker_hero_splashart_final

Flicker is a sneaky trickster able to disrupt foes with his debilitating abilities. Utilizing his stealth, Flicker can plunge deep into enemy lines causing mayhem or grant his entire team stealth to initiate on unsuspecting prey.

Flicker is one of the Bleekos — the mortal enemies of Petal’s Meekos. More on that troubled history is to come.

Read on for Flicker’s abilities. …


HERO ABILITIES

Bracket2
flicker_heroic_perk_sqaure

Willow Whisper (Heroic Perk)

Flicker gains stealth and a move speed bonus when in brush for a short duration. Flicker can then leave the brush and remain stealthed for a time. Taking damage or using abilities removes stealth.


flicker_aBinding Light (A)

Flicker commands his fairies to swarm a target location, dealing damage to enemies standing within it. When the effect expires, fairy light roots any enemy heroes still within the area.


flicker_bFairy Dust (B)

Flicker swirls fairy dust around him, slowing and dealing damage to anyone inside the dusted area. After a short duration, the dust ignites, dealing a burst of damage.


flicker_c

Mooncloak (Ultimate)

Flicker and his allies temporarily gain stealth and a move speed bonus. The stealth will break when a hero uses an ability, attacks or takes damage.


https://youtu.be/BKHabkCSmY0


VIDEO TEASERS

Bracket2
Want to see more Flicker? Check out the teasers for Vainglory’s next hero:

https://youtu.be/v6YD9_vBkZs

https://youtu.be/Cde0BAfvC6c


Keep an eye on the in-game News section for more Flicker info and guides. Flicker will sneak onto the Halcyon Fold in Update 1.24.

‘Sorrowblade’ Glaive Tier II is Coming Soon!

  • Vainglory
  • |
  • Nov 01, 2016

sorrowblade_glaive_splashart02

In Update 1.24, ‘Sorrowblade’ Glaive Tier II wields Vainglory’s most popular weapon! Watch for him in the in-game market.


CHECK OUT HIS 3D MODEL: 

SKIN HIGHLIGHTS:

  • All-new black fur look
  • Feel the power of the mighty Sorrowblade, inspired by the in-game item!

ALTERNATE FATE LORE

The Chosen Hunter

One autumn, Glaive went ice fish hunting (for there is no word in the Grangor tongue like “fishing;” the Grangor use the word “hunt” for anything that is acquired through skill or cunning). He drilled a hole in the ice at the center of the great lake, impaled a wiggling ground-dwelling invertebrate onto the hook of his twine-dangling fish hunting weapon and hunkered down into his fish hunting stance, which was a comfortable sitting position. After some time his head nodded with the impending vision quest, which is how Glaive would explain later that he had fallen asleep, and that is when he heard a deep, booming voice.

Greetings, Grangor. Tell me your sorrows.

Glaive startled out of his dream and looked over his left and then his right shoulder. No one was about. He peered into his drilled fish hunting hole. “What is a sorrows?”

Sorrow is the feeling of emptiness that follows a great loss, replied the voice in a cold, bubbly way from under the surface.

“Can’t say I’ve ever felt that,” said Glaive.

Sorrow is felt when a loved one dies.

“All living things die, then are reunited in the Nether realm,” replied Glaive. “Why should I feel emptiness for that?”

It is the feeling of prey escaping.

Glaive scoffed. “Prey that runs from me dies with my blade in its spine.”

Have you never been rejected by a female?

“That too, could never happen,” said Glaive, and brushed a bit of lint off of his shoulder.

Congratulations, said the voice, and the thick and meaty arm of a water troll burst through the ice, a great axe in its fist. You have been chosen to carry the great named axe, Sorrowblade, that was thrown into this icy deepness long ago to protect mankind. Only you, great hunter, will not fall to its terrors.

Glaive took the weapon in his hands and tested its weight, marveled at the dynamic harmony of head and helve. The axe handle glowed red with a foreign force. “I’ve never seen its like. What manner of power is this?”

It is called technology, said the voice. It is the harnessing of the power of fire, lightning, magic, the sun, even the Churn.

“Are you sure you don’t want it?”

It makes the fish sad, said the voice, farther away now. Now go, and tell those machine-makers to stop dumping their stuff here.


CANON GLAIVE LORE:

Glaive The Grangor
Glaive Meets Ringo


‘Just Beginning’ to ‘Vainglorious’: Explaining Items Part 3: Defensive Items

  • Vainglory
  • |
  • Oct 27, 2016

161018_n2p_1000x500

Are you new to Vainglory? Or, are you perhaps struggling to keep up with your allies and enemies? This series will bring new players up to speed and help those 0-10 players break the slump and start consistently succeeding. Here, we’re going to explain defensive and utility items. We’ve already covered red (weapon) and blue (crystal) items in earlier articles, which we recommend players read first.

Have you ever been frustrated by an enemy SAW riddling you with bullets? Or wondered how to detect an enemy Taka? Or maybe you’re flustered by an enemy Skye’s ability to flee from you? Ever wonder why, when you attack an enemy, it never seems to do enough damage — but when they attack you, you die nearly instantly? Then read on, dear reader, because you’re in the right place! Today we’re talking about defensive items. Defensive items, simply, are designed to help keep you alive by giving you more life and preventing damage.


SHIELD, ARMOR & LIFE

The fourth tab in the Item Shop is dedicated to defensive items. There are three types of defensive items: Shield (which is yellow in color), armor (which is bronze) and health (which is green). While all three will keep you alive for longer, each focuses on something different.

Shield, meanwhile, is designed to counter blue (crystal) items. If your enemies are using their abilities to do damage to you, buying shield is always a good idea. In order to determine what kind of damage your enemy is doing, you can tap on the Scoreboard icon in the right corner of your screen. That will show you what items your enemies have purchased. If your enemy has a great deal of blue (crystal) items, then buying something like a Light Shield is exceptionally important. This is called “counterbuilding” and is a core concept of Vainglory.

Armor makes every point of health more effective. It’s a great counter to enemies who are using red (weapon) items. The best way to explain how armor works is to use an example: Let’s say you have 1000 health and are facing an enemy who has bought exclusively red (weapon) items. If you have 100 armor, it’s as if you have 2000 HP.

Simply put, armor and shield makes your base health/HP last longer.

Green items increase your base health. Buying green items is good against both weapon and crystal damage because it will take more hits to kill you. If an enemy hero’s basic attacks do 50 damage and you have 300 health, you’ll die in six hits. But if you have 500 health, you’ll die in 10 hits. That extra health grants you extra time to defeat the enemy hero or flee — in both cases, keeping you alive for longer.


https://www.youtube.com/watch?v=NK3pC-_K_bY&feature=youtu.be


UNDERSTANDING THE TIER SYSTEM

As we’ve discussed in previous articles, you should think of purchasing items as purchasing ingredients; you want to have a powerful Tier III item in mind and then see what you need to buy first in order to get it. So, if you want to purchase that Fountain of Renewal — a great item to help revive the health of your team — you’ll first need to purchase a bunch of lesser items including an Oakheart and a Lifespring. Occasionally, you’ll have so much gold that you can buy both the ingredients and the final powerful item at once, but that’s probably an indication that you should have spent your gold a while ago! Better to increase your power in small steps than be weak for a long time and then have a massive power spike.

When you first start a game of Vainglory, you’ll start out with just enough gold to buy an Oakheart. An Oakheart is a Tier I item, meaning you can get it immediately without purchasing anything else. You’ll also notice that it’s an ingredient for several Tier III defense items in the game. After purchasing it, you’ll have the opportunity to upgrade it to a Tier II item if you have sufficient gold. In order to get more gold, you’ll need to kill minions, monsters and enemy heroes. The great thing about buying any lower-tiered item is that you’ll get the next tiered item in that progression at a discount — so there’s no downside in buying that Oakheart while you save up for that Tier II Dragonheart or Lifespring. Again, it’s always good idea to spend your gold.

So let’s say you’ve bought that Dragonheart. You now have 400 + health. That means you’re that much harder to kill AND if you’re roam/support, your healing abilities are that much more effective. We’ll talk more about who should be purchasing green items below.


WHAT HEROES BENEFIT FROM DEFENSIVE ITEMS

All heroes benefit from defensive items. Since there are three different types of defensive items, it is hard to generalize which heroes should purchase which. That said, roam heroes such as Lyra, Phinn, Adagio and Ardan benefit from green (health) items. As a roam hero, you want to buy items that help the team such as Crucible and Fountain of Renewal. It’s best to try to avoid things that are “selfish” that only keep you alive, such as Aegis.

Why do roam heroes purchase so many defensive items? Often, roam heroes like Lyra and Adagio have healing abilities that can bring their allies back from the brink of death. These healing abilities are based on their own life total. Essentially, by purchasing green items, they are not only augmenting their own health, but their allies’ as well.

Non-roam heroes also benefit from defense items, of course. How many defensive items you purchase, and which ones, largely depends on two factors: your opponents and your individual hero. If you’re a ranged hero, you might want to buy an item or two that is defensive oriented with at least one being a direct counter to your opponent’s builds. If you’re a melee, then you’re more likely to take damage and therefore should pick up two to three defensive items. Roam, in contrast, is usually buying five to six defensive items.


WHAT TIER III ITEMS TO BUY?

fountain-of-renewalFountain of Renewal: Currently, Fountain of Renewal is the most important item for team defense and is usually purchased first by nearly every roam hero. It grants a team-wide heal upon activation. The lower your team’s health, the more they’ll be healed. The great thing about Fountain of Renewal is that there is never a point in the game where they don’t need more health.


crucibleCrucible: Crucible is fantastic at blocking ultimates or large stuns. When Adagio is about to line up his ultimate or Celeste is about to unleash a core collapse or Joule is going for her rocket jump, Crucible can save the day. Tired of getting hooked by Phinn? Quick reflexes on Crucible is your answer.


atlas-pauldronAtlas Pauldron: Atlas Pauldron is used to reduce the attack speed of the enemy damage-dealer or harasser. Against an enemy Krul equipped with a Breaking Point? Then, Atlas Pauldron is the best item to counter-build. As soon as you see that an enemy has built a Breaking Point, build an Atlas Pauldron ASAP. But be aware that Pauldron is difficult to use — requiring you to activate it when virtually face-to-face with the enemy. While it counters anyone with high attack speed, you have to get close enough to use it. So usually only warriors, assassins and roam heroes will buy it.


Aegis
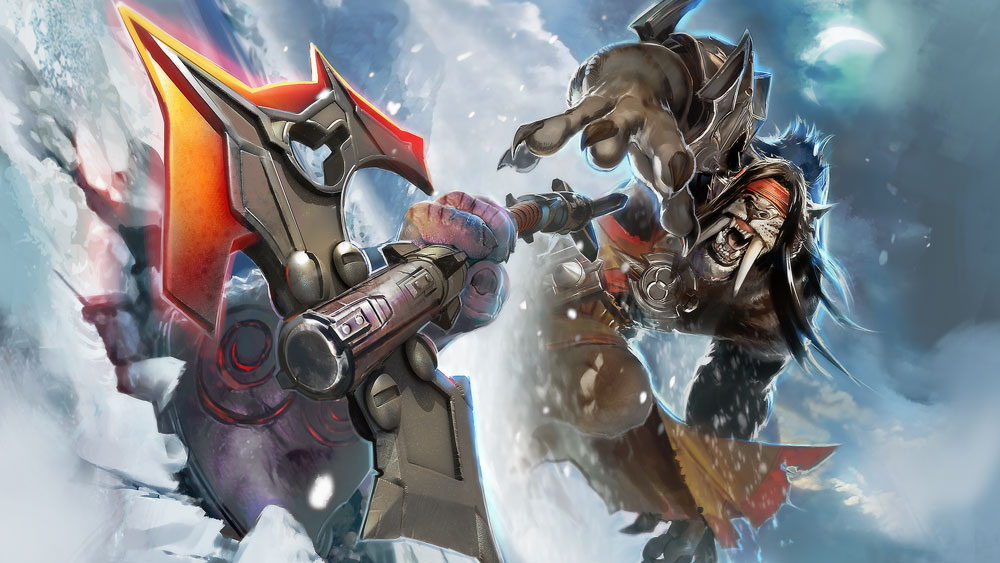
Aegis: Aegis gives the player the highest amount of shield in one item. It also grants the player a Reflex Block to protect themselves from crowd control attacks.


metal-jacketMetal Jacket: Metal Jacket offers the highest amount of armor in one item and is used primarily to protect you from weapon damage. Keep dying to weapon damage? Buy a Metal Jacket or two. If remembering (or having the proper reflexes) to trigger Atlas Pauldron at the right time is too much, then this is the item to buy instead.


CONCLUSIONS

Everyone can buy defensive items, just remember the following:

  • Armor counters weapon
  • Shield counter crystal
  • Health makes you live longer but is especially important for roam characters
  • Roam heroes should buy a mixture of health, shield, armor and utility items
  • Fountain of Renewal, Crucible are high-priority purchases for the roam hero.
    Tier III defensive items all counter some enemy strategy. Experiment to see which ones work best for you!

As informative as any guide can be, there is nothing better than hands-on experience. Play a game with bots to try out the different defensive items in real-time. Maybe you find success playing Ardan and focusing on building a ton of health to keep you and your teammates alive, or maybe you feel better buying shield to counter an enemy mage. The combinations are endless, and learning what works best for you is part of the fun!

Check back soon for another ‘Just Beginning’ to ‘Vainglorious’ guide to playing Vainglory.

Gwen Hero Breakdown – Get an Early Edge

  • Vainglory
  • |
  • Oct 17, 2016

gwen
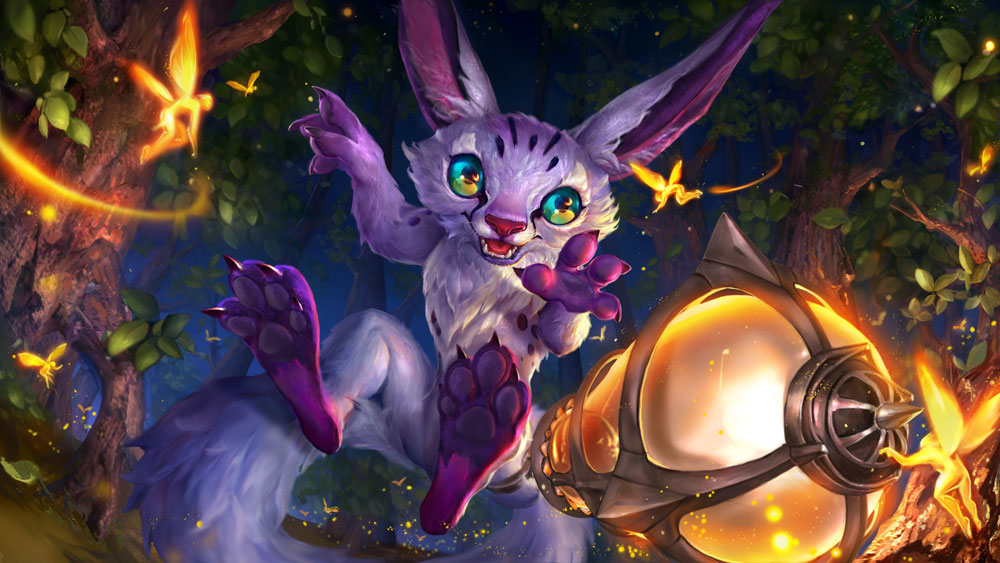
Most heroes have to flee powerful crowd control abilities. Most heroes live in fear of being stunned, silenced or otherwise slowed. But not Gwen. Gwen can shake off negative effects, turning the tables in her favor due to her powerful Skedaddle ability. This “get out of jail” free card gives her a way to slip away from slows, roots, stuns and silences that no other hero possesses. Plus, her two blazing guns provide a perfect complement to her hit-and-run tactics. With her Buckshot Bonanza, she has one of the most reliable damage-dealing abilities in the game that also slows opponents — perfect for setting up the kill or ensuring her own escape. While not possessing the greatest range, Gwen has an intriguing mix of mobility and power. Read on to learn how to master this slippery sniper…

Bracket1-1

HERO ABILITIES

Bracket2


gwen-icons_passive_sizedBOOMSTICK (HEROIC PERK)

After not attacking for 1.6 seconds, Gwen’s next basic attack deals 30-115 + (50% bonus weapon power) additional damage. Attack speed reduces the time before this empowered attack becomes available.


gwen-icons_a-sizedBUCKSHOT BONANZA (A)

Gwen blasts enemies in the target direction, damaging all targets in a cone. Enemies hit by this ability are slowed and revealed for 2 seconds


gwen-icons_b_sizedSKEDADDLE (B)

When activated, Gwen instantly removes negative effects from herself and blocks further effects for a short time. Additionally, she gains a temporary burst of bonus move speed.

Passive: Gwen gains bonus move speed. This effect is disabled for a few seconds upon taking damage from an enemy hero, but it is otherwise permanent.


gwen-icons_c_sizedACES HIGH (ULTIMATE)

Gwen pulls an ace from up her sleeve and flings it in the target direction. The card deals damage to everything it passes through. The ace impacts and stuns the first enemy hero in its path.


Bracket1-1

DUELING

Bracket2

While Boomstick is a great heroic perk, when engaging with enemy heroes 1v1, you’ll actually do more damage stutter stepping. But, if you find yourself on the losing end of a battle, don’t stutter step in your retreat. Instead, wait for Boomstick to cool down, fire — and then run.

Her Buckshot Bonanza is one of the most reliable abilities in the game because of its large area of effect and guaranteed damage. But her range is somewhat limited. When you initiate against an enemy hero, you should get in range and attack with Buckshot Bonanza, which both damages and slows enemies. Then, Gwen should hit with her Aces High while the enemies are still slowed. While a powerful ability, Aces High is a slow-travelling projectile and therefore dodgeable. Combined with the slowing effects of the Bonanza, however, you increase the odds of actually hitting with Aces High.

Skedaddle is fantastic for getting a player out of bad situations by clearing CC debuffs and granting her a half-second immunity from further crowd controls (being rooted, slowed or silenced). She can also use Skedaddle to chase down enemies in order to finish them off. But be careful not to use Skedaddle and leave yourself in a vulnerable position. Without an escape route, Gwen can become a sitting duck.

Bracket1-1

TEAMFIGHTS

Bracket2

Gwen is a fragile character who prefers to be on the edge of a fight. Her Skedaddle has a long cooldown so it should really only be used in emergencies and to deal with major enemy crowd control.

Similar to her dueling strategy, Gwen players should use her Buckshot Bonanza + Aces High combo to secure a kill on the enemy carry. Alternatively, you can use this combo to peel for yourself. If you need to do more damage, you should stutter step. But if you need to be more mobile, utilize your Boomstick perk. If you’re using this latter strategy, then it’s recommended that you buy as much weapon damage as possible; stutter stepping will give you more constant damage output but being able to unleash a more potent attack every few seconds does have its benefits.

Let’s say you’re in a 1v2 situation not in your favor. This is a great opportunity to take advantage of your heroic perk. Stay mobile and fire back once the perk is ready. Once they’ve utilized a crowd control move on you, use your Skedaddle to escape. Alternatively, if you have vision, you can avoid an unfavorable fight entirely by using Skedaddle and heading back toward your turret.

If you’re part of a 2v1 scenario in your favor, then the same basic-attack principles for dueling and teamfighting apply: Use your Buckshot Bonanza to slow, your Aces High to stun and your Skedaddle to negate any slowing effects an escaping hero may throw at you.

While not recommended, Gwen can also build crystal items. Crystal items give her longer range but also a much slower rate of attack. Crystal Gwen strategies take advantage of her high movement speed and — through purchasing items such as Clockwork — the low cooldowns on her abilities. Essentially, Gwen’s approach to teamfighting is to stay far out and then run in and use her Bonanza to catch as many enemies as possible. After that, a Crystal Gwen should use her Aces High, and then Skedaddle away and out of range of retaliation. The benefits of this strategy is how well this utilizes her speed bonuses and the reliable and long-range damage-dealing abilities of her kit. The downside is that Gwen will be much less effective in sustained fights, so if she gets caught by Phinn’s anchor or some other enemy-slowing effect, she’s dead meat. Also, her heroic perk, arguably one of her best attributes, scales with weapon. It’s useful for last-hitting minions but with a CP build, it’s not going to help in the late game.


Bracket1-1

WEAPON BUILDS

Bracket2

sorrowbladeSorrowblade: A great pick for Gwen because it increases her base damage and scales with her perk.


breaking-pointBreaking Point: An item that offers more weapon damage over time and grants Gwen more attack speed. Plus, Buckshot Bonanza does weapon damage which gives you easy Breaking Point stacks.


tyrants-monocleTyrant’s Monocle: Want more damage per second? Then look no further than Tyrant’s Monocle. If you critical hit with your initial hit, you’ll have a very strong burst opening. Unfortunately, perk damage is not being amplified by critical damage.


bonesawBonesaw: If your enemy has a lot of armor, Bonesaw is a great choice. Plus, it will lower the cooldown on your heroic perk.


AegisAegis
: Since Gwen is fragile, having a reflex block is exceptionally useful.


Bracket1-1

STRONG VERSUS

Bracket2


ardanArdan: Ardan’s ultimate is easily countered by Gwen’s Skedaddle, letting you walk through the gauntlet.


krulKrul: Gwen can get away from his heroic perk or his ultimate but not necessarily both. With her Buckshot Bonanza, she can also slow him.


catherineCatherine: Gwen’s Skedaddle ensures she can’t be held down by Catherine’s silence or stun.


Bracket1-1

WEAK VERSUS

Bracket2


ozo
Ozo: Ozo has too many ways to close the gap between him and Gwen. He also has no abilities that her Skedaddle counters.


reimReim: Reim’s abilities at maximum rank have too much range for her to contend with. Baron, similarly, has too much range for her to handle.


Bracket1-1

PRO TIPS

Bracket2
 

  • Skedaddle gives you a move speed boost so long as you’re not being hit by enemies. So, you can use it to move to objectives faster.
  • Her Buckshot Bonanza ability will reveal stealth. If you want to check bushes, why not fire and see what stumbles out?
  • Hitting multiple heroes with Buckshot Bonanza will give you multiple Breaking Point stacks. So Breaking Point should be a high priority for nearly all Gwen builds.

Gwen Abilities & Splash Art Revealed!

  • Vainglory
  • |
  • Sep 30, 2016

gwen

Gwen moves swiftly through the Fold, picking off enemies from a distance. She can shake off negative effects, turning the tables in her favor. Gwen is best played in the lane where she can earn gold and gear up for big fights.

Read on for Gwen’s abilities. …


Bracket1-1

HERO ABILITIES

Bracket2

gwen-icons_passive_sizedBoomstick (Heroic Perk)

After not attacking for a brief time, Gwen’s next basic attack deals additional weapon damage. Attack speed reduces the time before this empowered attack becomes available.


gwen-icons_a-sizedBuckshot Bonanza (A)

Gwen blasts enemies in the target direction, damaging all targets in a cone. Enemies hit by this ability are slowed and revealed for a short time.


gwen-icons_b_sizedSkedaddle (B)

When activated, Gwen instantly removes negative effects from herself and blocks further effects for a short time. Additionally, she gains a temporary burst of bonus move speed.

Passive: Gwen gains bonus move speed. This effect is disabled for a few seconds upon taking damage from an enemy hero, but it is otherwise permanent.


gwen-icons_c_sizedAces High (Ultimate)

Gwen pulls an ace from up her sleeve and flings it in the target direction. The card deals damage to everything it passes through. The ace impacts and stuns the first enemy hero in its path.


Bracket1-1

VIDEO TEASERS

Bracket2
Want to see more of Gwen? Check out the teaser trailers for this new hero:

https://youtu.be/hhFJZPBlXxk

https://www.youtube.com/watch?v=v_TgjbQF8_w&feature=youtu.be


Keep an eye on the in-game News section for more Gwen info and guides. Gwen will hit the Halcyon Fold in Update 1.23. 

Squid Ink: Explaining Opals

  • Vainglory
  • |
  • Sep 29, 2016

160928_opals-feature

In this regular column, Vainglory Senior Editor BicycleSquid highlights interesting, confusing, complex or obscure aspects of Vainglory. If you’d like to see a topic covered, let him know here.

Every time you start a new season, we want you to be excited for new, rewarding experiences. To that end, we introduced a new currency, Opals, which open up amazing opportunities for you to unlock Special Edition skins at whatever pace fits your playstyle.


What are Opals & how do I get them?

Opals are a super-rare currency that you may get from your Daily Chest and Season Chest. Use Opals to unlock Special Edition skins such as Moon Princess Celeste and Summer Party SAW.


How do I spend my Opals?

Visit the in-game Market and look for skins with an Opals icon and cost. Eventually, there will be a dedicated Opals section of the Market that only contains these Special Edition skins.


What Opals skins will be available and when?

So far, Summer Party Phinn is the only skin available to unlock with Opals. More and more Special Edition skins will be added over time, based on the phases below:

PHASE ONE: ICE PURCHASE

  • When a Special Edition (often seasonal) skin is first released, it will be directly purchasable with ICE.
  • That skin will also be placed inside the Season Chest. If you’re really lucky, you can instantly unlock the new Special Edition skin when you use a key to open the Season Chest!

PHASE TWO: OPALS MARKET (IN SEASON)

One update later (aprox. one month after release), the Special Edition skin will move into the Opals section of the Market and no longer be available for direct ICE purchase. At this point, the only way to get the skin is with Opals.

At this point, the skin is also considered “in season.” When a skin is first in season, it will be available at a significant Opals discount. I can’t stress this enough: If you can get a skin with Opals during its first season, do it!

PHASE THREE: OPALS MARKET (OUT OF SEASON)

When the next season launches, the out-of-season skin’s Opals cost may go up significantly. This may also vary from skin to skin. Note: A skin is only “in season” once; it won’t be at a reduced price again a year later.


Coming Soon: ‘Baewitched’ Celeste & ‘Pumpkin Spice’ Petal (Special Editions)

Vainglory has been cast into darkness by Petal’s eternal enemy, the Bleekos! Introducing the new Special Edition versions of ‘Pumpkin Spice’ Petal and ‘Baewitched’ Celeste — spooky new designs based on the original Limited Edition favorites.


What’s the difference between Limited Edition and Special Edition skins?

Seven Limited Edition seasonal skins were released in the past between Spring 2015 and Autumn 2016. These include fan favorites such as Gift-Wrapped Fortress, Pumpkin Spice Petal and Night Shadow Taka. Over time, we will be releasing new Special Edition versions of these skins that are distinctly different than the originals. And good news: If you already own the original Limited Edition skin, you will automatically get the new Special Edition skin at no additional cost!

Important note: These seven reissued skins only will skip the “direct ICE purchase” phase and go directly into the Opals Market upon release.

Moving forward, we will release Special Edition skins, often seasonal in nature. New Special Edition skins will follow the phases above, starting as a direct ICE purchase and then move into the Opals Market. So, your Opals can be used on any future Special Edition skin!


DISCLAIMER: EVERYTHING CAN CHANGE! 

The Opals system is brand-new, and we’re going to learn a lot over time and hear feedback from the Vainglory Community. What we’ve stated above is the current plan of record, but we may need to tweak — or even overhaul — the plan for Opals and Special Edition skins as we learn what’s working amazingly well and what’s not. Please do not consider any statements about Opals or Special Edition skins as forever set in stone. That said, we’ll do our very best to alert players well in advance if any changes are incoming.


Opals are already in the game! Go play and collect them now and save up for that Special Edition skin of your dreams.

‘Just Beginning to ‘Vainglorious’: Explaining Items Part 1: Blue (Crystal) Items

  • Vainglory
  • |
  • Sep 22, 2016

160922_noob2pro-blueitems

Are you new to Vainglory? Or, are you perhaps struggling to keep up with your allies and enemies? This series will bring new players up to speed and help those 0-10 players break the slump and start consistently succeeding. Here, we’re going to explain crystal items, commonly referred to as “blue” items. Check back next week for our guide to red items.

You don’t want to bring a knife to a gunfight. So, you don’t want to bring the wrong item to the Halcyon Fold. Knowing what items to buy is pivotal to success in Vainglory. In simple terms: Items make you better. They make you run faster, strike harder, regenerate energy quicker and, in the words of Professor Snape: “put a stopper on death.” Not surprisingly, buying items is often the most confusing aspect of the game for new players. There are several different types of items — weapon, ability, defense and utility — that all have various advantages and counters.

If you find your hero can’t make a dent in another hero’s health, that might be because they’ve bought an item that counters yours. Similarly, if you’re befuddled by how an enemy hero keeps annihilating you with only a couple hits, you may not have the right defensive items or they may have vastly superior offensive items. We’ll start with the basics: weapon and crystal items.


WHERE TO SHOP

When a match starts, you’re already in your home base item shop. Here, you’ll have the chance to select your first items. The store has six tabs and starts in the “Recommended” tab. You’ll see your gold total in the bottom and this will increase throughout the game as you kill lane minions, jungle monsters and enemy heroes.

As a beginner, it’s always a good idea to just buy the recommended items as soon as you have the gold. As you move around the map, you’ll have many chances to kill stuff. Every time you kill something, you get gold — and gold is the key to your success. That’s because gold gets you items, and items make you more powerful. One of the biggest mistakes new players make is not spending their gold, so remember to shop often and use all of the gold you can!

Item recommendations are based on the hero that you’ve selected. So if you’ve selected Glaive, a warrior, the first recommended item is the Weapon Blade. But if you want to progress as a Vainglory player, you’ll have to move beyond recommended items. Vainglory’s recommendations for purchases don’t change based on enemy tactics, for example. It’s important you understand how items work so you can make intelligent purchase decisions based on your own character’s strengths and the strengths of your opposition.


CRYSTAL ITEMS

So what are crystal items? Crystal items make your unique hero’s three abilities more powerful. As an example, let’s look at Celeste, a mage hero. She has three abilities: Heliogenesis, Core Collapse and Solar Storm. These abilities all do a set amount of damage that items augment.

When examining an item, you’ll see that each comes with stats: “+20 CP”, “+50 CP”, etc. The best way to explain how crystal power (CP) works is to use an example. Let’s say you have a Crystal Bit. It’s an inexpensive item that you can immediately buy and is often a good purchase if you’re playing a mage. A Crystal Bit gives your hero +20 Crystal Power. If we look at Celeste, her Heliogenesis ability normally does does 120 Crystal damage. With the Crystal Bit, you’d do 140 damage. There are other calculations involved: what crystal ratios you have, what level you’re at, etc. But at its most basic, more crystal power means more damage with your abilities.


WHAT HEROES BENEFIT FROM BLUE ITEMS

Typically, the heroes that benefit most from blue items are spellcasting mages such as Celeste, Skaarf, Samuel and Reim. Heroes who focus on protection such as Lyra, Adagio, Ardan and Catherine also benefit from blue items. In Vainglory, most heroes are incredibly flexible and building blue items — even when not typical — can reveal surprisingly powerful playstyles. But for now, it’s best to focus on those heroes who most naturally and obviously benefit from lots of blue.


UNDERSTANDING THE TIER SYSTEM

Vainglory has some truly powerful items. Each of these items has ingredients that need to be purchased first in order to complete their recipe. So, if you want to purchase that Shatterglass — a powerful item for increasing your damage — you’ll first need to purchase a bunch of lesser items including Crystal Bit and a Heavy Prism. Think of purchasing items as purchasing ingredients; you want to have a powerful Tier III item in mind and then see what you have to buy first in order to get it. Occasionally, you’ll have so much gold that you can buy both the ingredients and the final powerful item at once, but that’s probably an indication that you should have spent your gold a while ago! Better to increase your power in small steps than be weak for a long time and then have a massive power spike.

When you first start a game of Vainglory, you’ll start out with just enough gold to buy a Crystal Bit. A Crystal Bit is a Tier I item, meaning you can get it immediately without purchasing anything else. You’ll also notice that it’s an ingredient for virtually every Tier III crystal item in the game. After purchasing it, you’ll have the opportunity to upgrade it to a Tier II item if you have sufficient gold. In order to get more gold, you’ll need to kill minions, monsters and enemy heroes. The great thing about buying any lower-tiered item is that you’ll get the next tiered item in that progression at a discount — so there’s no downside in buying that Crystal Bit while you save up for that Tier II Heavy Prism. Again, it’s always good idea to spend your gold.

So let’s say you’ve bought that Heavy Prism. You’re doing a lot more damage now! Let’s look at Celeste’s Heliogenesis ability again. As mentioned before, Celeste’s Heliogenesis ability would normally do 120 crystal damage at Level 1. With a Heavy Prism, it would do 50 points more of damage. So that 120 would suddenly become 170.

Next, you’ll want to purchase your first Tier III item. While any crystal-focused hero will usually buy the same Tier I and Tier II items, purchasing Tier III items depends a great deal on your hero. Since each Tier III items does something slightly different, all of these options can be especially daunting to new players.

WHICH TIER THREE ITEMS TO BUY

So you’ve selected your hero and decided that you want to focus your purchases on blue items. Now what? Deciding which Tier III items to purchase (and when) is also crucial to success.

shatterglassShatterglass: The highest CP value item, used to do maximum ability damage. Want to make a lot of stuff go boom? Then this is on your wishlist.


eve-of-harvestEve of Harvest: Steals life from your enemy. If you keep dying, having some lifesteal helps because every time you do ability damage to the enemy, it will heal you back a portion of the damage done! In other words, Eve of Harvest hurts them and heals you!


broken-mythBroken Myth: Does more damage the more you hit an enemy with an ability. Great for abilities with high base damage like Joule’s Big Red Button. Broken Myth is a must-buy for any mage class because they constantly hit people with their abilities.


clockworkClockwork: Not getting to use your abilities enough? Look no further than Clockwork. If you find you don’t have enough energy to use your abilities, then Clockwork can help you recharge quickly.


frostburnFrostburn: Frostburn adds slowing effects to your attacks. This is great for keeping enemies right where you want them


alternating-currentAlternating Current
: If you want your basic attacks to do damage while your abilities cooldown, this is a great option.


aftershockAftershock: After activating an ability, your next attack does a percentage of the enemy’s maximum HP. Great to take on high health targets like Phinn, Ardan or any tank.


Remember: Yellow Counters Blue

All the items in Vainglory fall into categories based on their color. There’s a huge amount of strategy that goes into “counterbuilding,” which means buying items based on the enemy’s purchases. We’re not going to go into all that now, but there is one thing you can keep in mind: Yellow (shield) items protect against blue (crystal) items. So, if you see the enemy building a ton of blue, you can build yellow items. If you’re suddenly doing a lot less damage with your abilities than earlier in the match, chances are that enemy bought a lot of yellow items to protect themselves from you.

We’ll go into defense items in part 3 of our guide.


CONCLUSIONS

To summarize:

  • Crystal items improve your hero’s abilities.
  • Mages generally benefit most from crystal items, but other heroes will benefit as well.
  • To buy crystal items, kill enemies and collect gold so you can afford stuff.
  • The more gold you have, the more powerful the items you can buy.
  • Tier III items are powerful but varied. Try them out to see what works for your hero and playstyle!

As informative as any guide can be, there is nothing better than hands-on experience. Play a game with bots to try out the different crystal items in real-time. Maybe you find success playing Celeste and focusing on maximum damage with Shatterglasses, or maybe you feel better buying Eve of Harvest and restoring health with the stars you rain down on the enemy. The combinations are endless, and learning what works best for you is part of the fun!

Check back next week for our guide to weapon items — the red counterpart to crystal items.

Free Hero Rotation (September 20): Try Joule, Celeste, Lance & More!

  • Vainglory
  • |
  • Sep 20, 2016

160920_fhr_article

Each week six heroes are temporarily unlocked for play in Casual and Private games. Try any of the heroes listed below before unlocking them with Glory or ICE!


LYRA (ROAM/PROTECTOR)

Drawing upon her training as a Gythian battlemage, Lyra uses healing and protective magic to turn enemy positions into powerful zones for her allies. Her portals also allow her team to bypass these positions entirely, avoiding defenses and terrain. Utility and defense items improve her role as a healer, while crystal items provide a devastating but fragile mage path.


PHINN (ROAM/PROTECTOR)

Phinn is an unstoppable tank who brings the fight to him. He pairs incredibly well with other heroes who don’t back down from battle. Phinn is strongest with defense and utility items, and he’s able to absorb immense amounts of punishment, protecting teammates while they dish out damage.


Splash_Petal_Bug_T2

PETAL (JUNGLE/SNIPER)

Petal commands a flock of Bramblethorn Pets known as “munions” that she uses to swarm her enemies from long range. She excels at long, sustained fights where damage from her small army really adds up. She can even single-handedly take out important objectives such as the Gold & Minion Mines.


LANCE (ROAM/PROTECTOR)

Lance depends on both his courage and his wits to protect his allies. With his unique polearm-and-shield combat style, he breaks enemy lines and creates opportunities for his friends. Lance can build crystal or utility items to excel in his role as a protector, or he can build weapon items to deal more damage during battle.


JOULE (JUNGLE/WARRIOR)

Joule is a hardened front-line fighter with built-in defensive plating. All of Joule’s abilities require proper aim to hit the intended target, but they have a devastating effect if you can aim properly. Pick Joule if you have an uncanny ability to predict enemy player movements. Joule can start in the jungle or lane.


CELESTE (LANE/MAGE)

Celeste commands the stars, drawing upon their power to overwhelm opponents. Her star formations help keep enemies at a distance as well as finish them off as they flee. Start Celeste in the lane and fight from the furthest edges of battle.


ABOUT THE FREE HERO ROTATION

The free hero rotation unlocks six heroes each week to play as long and as much as you want in the Casual queue. It’s an opportunity to test drive heroes before using ICE or Glory to unlock them.

The free rotation changes every Tuesday and heroes in the rotation usually won’t return for a few weeks or months afterward, so unlocking heroes is always worthwhile. The free rotation does not apply to Ranked play to ensure players are already very familiar with the heroes they play in that try-hard environment with skill tiers at stake.


Jump into the Fold now with this group of great heroes!